Wie teilt man eine Kontaktgruppe (Verteilerliste) in Outlook auf?
Angenommen, Sie möchten Ihre Kontaktgruppe mit Ihren Kollegen teilen – wie geht das? Und was tun Sie, wenn Sie eine in Outlook erhaltene Kontaktgruppe speichern möchten? Dieser Artikel zeigt Ihnen, wie Sie Kontaktgruppen in Outlook teilen können.
- Teilen Sie Ihre Kontaktgruppe (Verteilerlisten) in Outlook mit anderen Benutzern
- Teilen/Speichern Sie die Ihnen zugesendete Kontaktgruppe (Verteilerliste) in Outlook
Teilen Sie Ihre Kontaktgruppe (Verteilerlisten) in Outlook mit anderen Benutzern
Wenn Sie Ihre Kontaktgruppe in Outlook mit anderen teilen möchten, gehen Sie wie folgt vor:
1. Wechseln Sie in der E-Mail-Ansicht und erstellen Sie eine neue E-Mail, indem Sie auf Start > Neue E-Mail klicken.
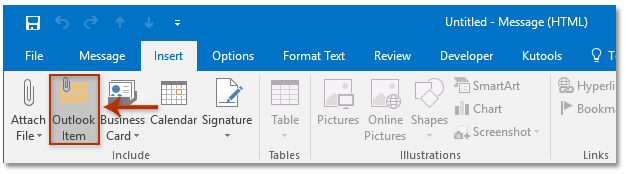
2. Klicken Sie im neuen Nachrichtenfenster auf Einfügen > Outlook-Element. Siehe Screenshot:
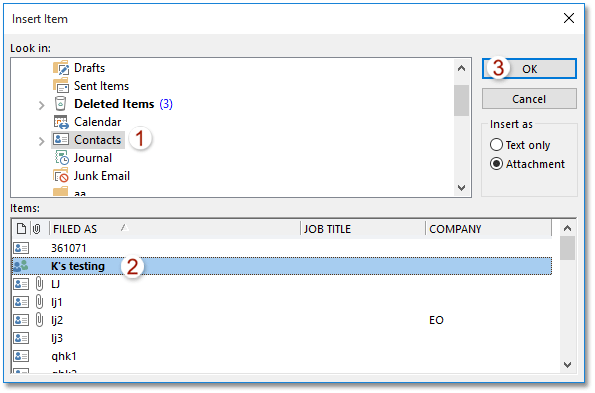
3. Führen Sie im geöffneten Dialogfeld „Element einfügen“ Folgendes aus:
(1) Wählen Sie im Feld Suchen in den Ordner Kontakte aus, der die Kontaktgruppe enthält, die Sie teilen möchten;
(2) Wählen Sie im Feld Elemente eine oder mehrere Kontaktgruppen aus, die Sie teilen möchten;
(3) Klicken Sie auf die Schaltfläche OK. Siehe Screenshot:
4. Die ausgewählten Kontaktgruppen wurden nun als Anhänge in die neue E-Mail eingefügt. Verfassen und versenden Sie Ihre Nachricht.
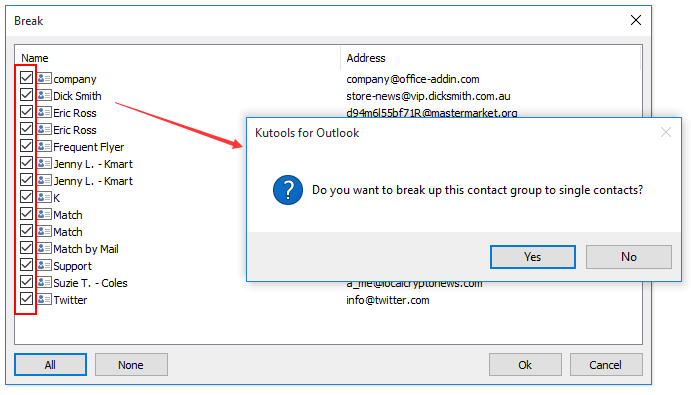
Speichern Sie alle Mitglieder einer Kontaktgruppe (Verteilerliste) gleichzeitig als einzelne Kontakte in Outlook
Mit der Trennen-Funktion von Kutools für Outlook können Sie alle oder mehrere ausgewählte Mitglieder im Handumdrehen als individuelle Kontakte in Outlook speichern.
Teilen/Speichern Sie die Ihnen zugesendete Kontaktgruppe (Verteilerliste) in Outlook
Wenn Sie E-Mails von freigegebenen Kontaktgruppen erhalten haben, können Sie diese Kontaktgruppe ganz einfach in Ihren Outlook-Kontakteordner kopieren und speichern.
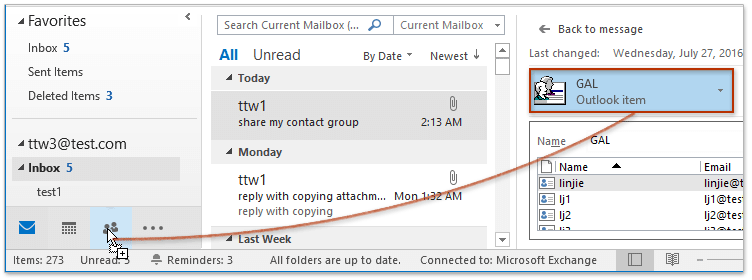
1. Wechseln Sie in die E-Mail-Ansicht und öffnen Sie die E-Mail mit den Kontaktgruppenanhängen im Lesebereich.
2. Wählen Sie die Kontaktgruppe im Lesebereich aus, ziehen Sie sie auf das Personen-Symbol ![]() oder
oder ![]() in der Navigation und lassen Sie die Maustaste los, sobald sich der Mauszeiger in
in der Navigation und lassen Sie die Maustaste los, sobald sich der Mauszeiger in verwandelt. Siehe Screenshot:
Die von anderen mit Ihnen geteilten Kontaktgruppen wurden bisher in Ihren Kontakteordner kopiert und gespeichert.
Verwandte Artikel
Kontakt hinzufügen aus Verteilerliste (Kontaktgruppe) in Outlook
Mehrere Absender von E-Mails zur Verteilerliste (Kontaktgruppe) in Outlook hinzufügen
Verteilerliste (Kontaktgruppe) auf einer Seite drucken in Outlook
Beste Office-Produktivitätswerkzeuge
Erleben Sie das komplett neue Kutools für Outlook mit 100+ unglaublichen Funktionen!Jetzt zum Download klicken!
📧E-Mail-Automatisierung: Automatische Antworten (verfügbar für POP und IMAP) / E-Mails zeitgesteuert versenden / Beim Senden automatisch CC/BCC basierend auf Regeln hinzufügen / Automatische Weiterleitung (Erweiterte Regeln) / Automatische Grußformel einfügen / Mehrfachadressierte E-Mails automatisch in Einzelnachrichten aufteilen …
📨E-Mail-Verwaltung: E-Mails zurückrufen, Betrugs-E-Mails anhand von Betreffzeilen und weiteren Kriterien blockieren, doppelte E-Mails löschen, Erweiterte Suche, Ordner organisieren …
📁Anhänge Pro: Stapelweise speichern / Stapelweise lösen / Stapelweise komprimieren / Automatisch speichern / Automatisch abtrennen / Automatische Komprimierung …
🌟Oberflächenzauber:😊Noch mehr hübsche und coole Emojis/Benachrichtigung bei wichtigen eingehenden E-Mails/Outlook minimieren statt schließen...
👍Ein-Klick-Wunder: Allen mit Anhängen antworten / Anti-Phishing-E-Mails / 🕘Aktuelle Uhrzeit der Absender-Zeitzone anzeigen...
👩🏼🤝👩🏻Kontakte & Kalender:Stapelweise Kontakte aus ausgewählten E-Mails hinzufügen/Eine Kontaktgruppe in einzelne Kontakte aufteilen/Geburtstagserinnerung entfernen...
Nutzen Sie Kutools in Ihrer bevorzugten Sprache – mit Unterstützung für Englisch, Spanisch, Deutsch, Französisch, Chinesisch und über 40 weitere Sprachen!


🚀 Ein-Klick-Download – Holen Sie sich alle Office-Add-Ins
Stark empfohlen: Kutools for Office (5-in-1)
Mit einem Klick fünf Installationsprogrammegleichzeitig herunterladen –Kutools für Excel, Outlook, Word, PowerPointund Office Tab Pro.Jetzt zum Download klicken!
- ✅Ein-Klick-Komfort: Laden Sie alle fünf Installationspakete mit nur einem Klick herunter.
- 🚀Bereit für jede Office-Aufgabe: Installieren Sie die Add-Ins, die Sie brauchen – genau dann, wenn Sie sie benötigen.
- 🧰Enthalten: Kutools für Excel / Kutools für Outlook / Kutools für Word / Office Tab Pro / Kutools for PowerPoint